How to Facilitate a Remote Workshop on Cognitive Biases
Some time ago, my friend Laurence Vagner and I created a workshop animated by a deck of 60 UX Cards to Discover Cognitive Biases. Facilitating it was all fun and really instructive. Due to the pandemic, we brought this workshop online, and designed a remote version. Here is how we prepared and animated it. And is some advice if you too want to facilitate your own remote workshop on Cognitive Biases. You can get the board templates if you don’t want to build it yourself.
Tools and preparation to bring our workshop online
That was the “face to face” workshop. This year, we adapted it to animate it online and remotely as well.
Digital whiteboard and conference tools
We have one big constraint: this is a group exercise. So we need tools that will let us accommodate that. First, we need an online whiteboard that lets us have multiple users at the same time. Then we need a video conference tool that lets us send people into groups for the 2 phases, present and share content.
We used Miro for the board tool, but Mural of Figjam should work. For the video conference tool, we used Hopin (because it was the tool offered by the workshop organizers). You can also use Zoom since it has breakout rooms. I think Big Blue Button offers the option as well. I also discovered butter.us recently and they have breakout rooms too. It’s an all in one online tool for facilitation that integrated nicely with Miro.
Preparing our main boards
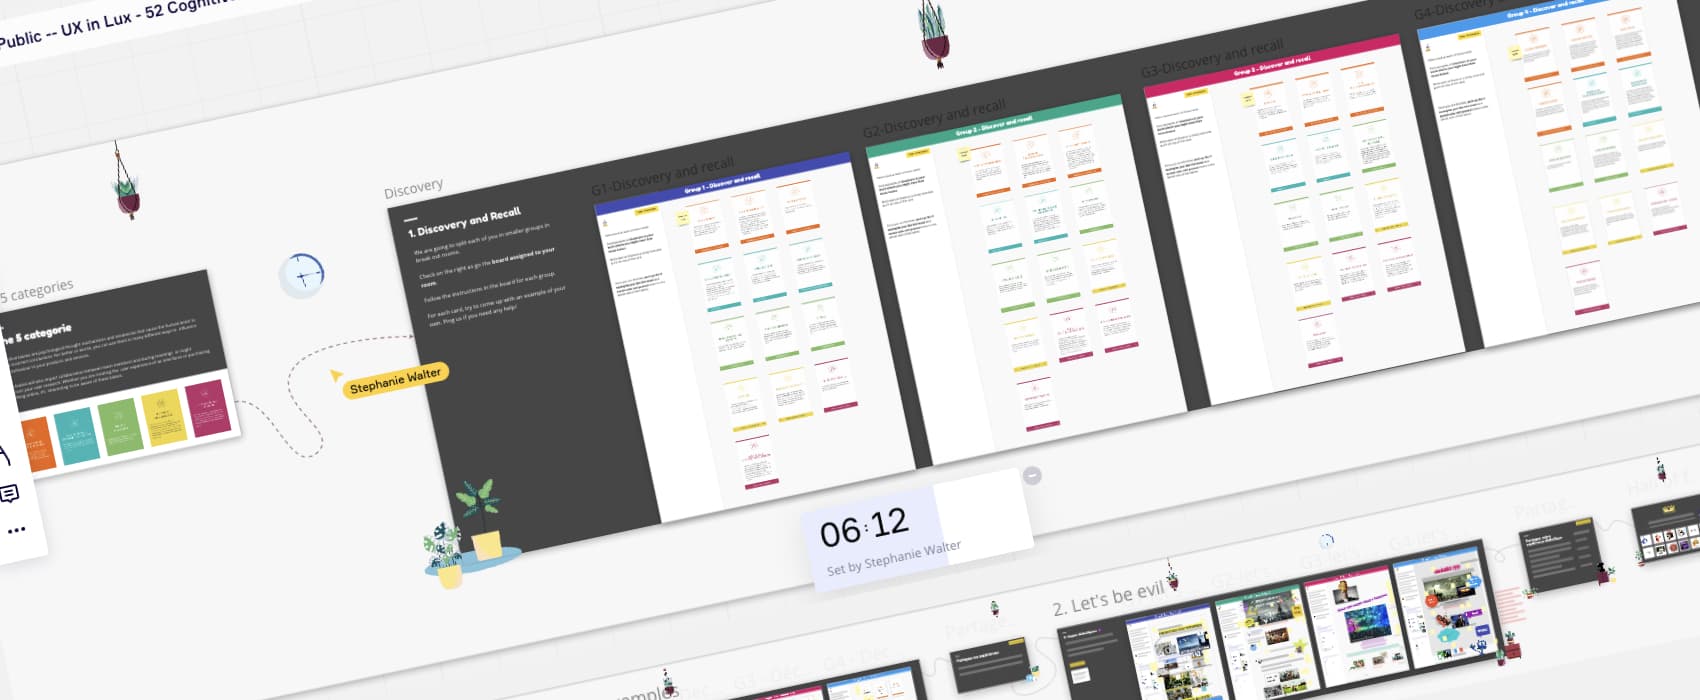
For phase one, we split one board in 4 areas for 4 groups. We identified groups with both color and number. Each board also has the detailed instructions on the left. Remember that we will send people to break out rooms. So it’s always nice to have a reminder of the phase instruction somewhere. We have multiple exercises, for each, we keep the boards with the group name at the top.
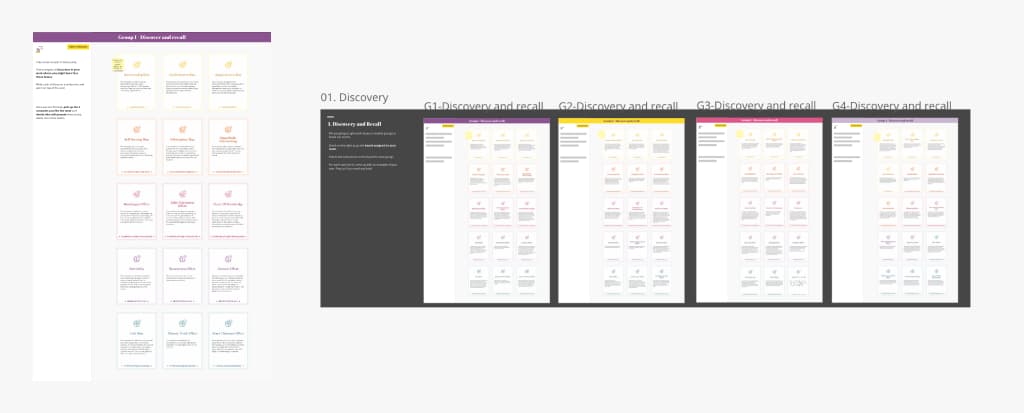
Preparing our other boards
Those are my 2 main boards. Then we built some small little boards around those, to turn this into sort of a map, with arrows. The workshop starts on the left of the screen, and then we follow the arrows, activity by activity.
We added a couple of more boards including:
- a small introduction
- icebreaker
- some boards to bring people back in the main room and share
- a hall of fame for the evil winners
- a board for the discussion about ethics
- a board with resources
Get the workshop templates (Miro and Figjam)
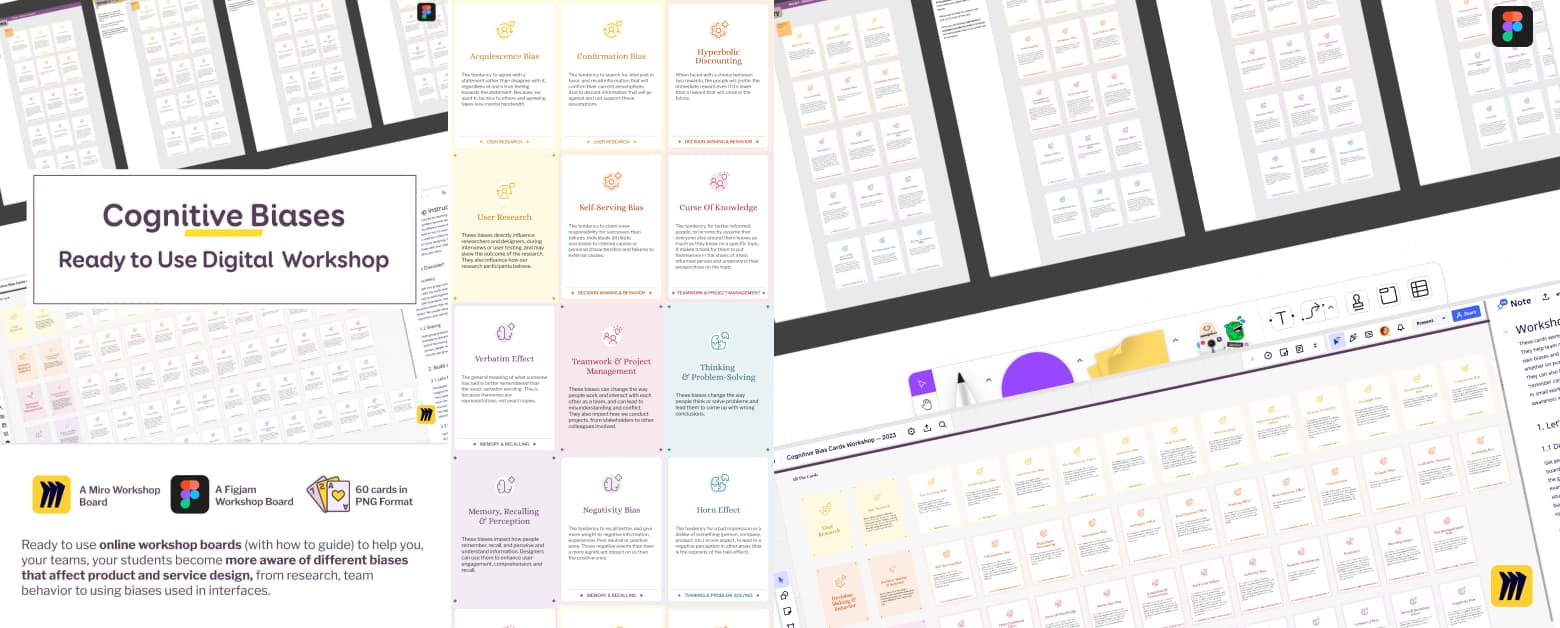
It’s all fun to build your own workshop template and I really enjoy doing this. If you want to save some time, and run this workshop remotely with your teams and / or students, I’m happy to announce that the Miro and Figjam (+ the 60 cards in .png format) are available in my shop:
Get the Workshop Miro/Figma Templates
If you are interested in a remote workshop with the cards, please contact me!
How we animated our workshop
As mentioned above, once we have the boards, then facilitation is about going from left to right through the board.
We started with a small introduction to biases. For that we had our usual presentation. Instead of sharing it on a video-projector, we shared our screen. We then started an icebreaker to get people used to Miro (more on that in the next section).
The rest of the workshop is the same as the non-remote one. Instead of having them work in groups around a table, we send them to break out rooms. Then close those rooms to send everyone back to the main room. During the group sessions, Laurence and I would jump from one group to another. We checked everything was okay with instructions, if they had questions. Occasionally we also give some examples for some biases if people can’t find any.
Since we want people to share at the end, we also reminded people in the groups to decide for the sharing part who will present and what they will present while being in group. This helps smoothen the process of presentation.
For the presentation, people used their microphone. Since everything was on Miro, I was sharing their boards. This avoids wasting time with technical issues of screen sharing. But this might not be possible if people are working on something outside of Miro for example.
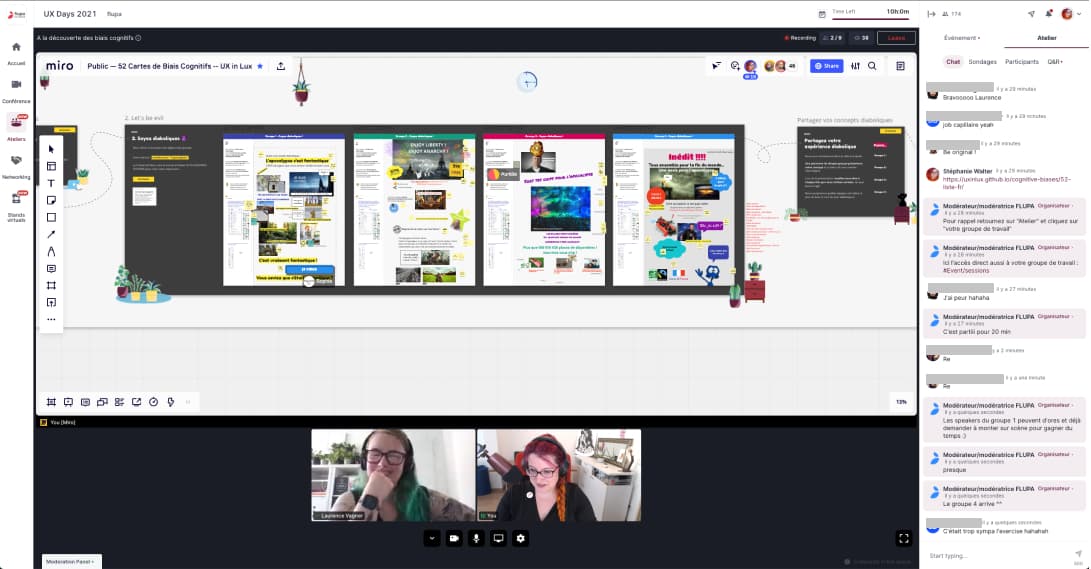
We did this workshop in French for Flupa. And asked them to “sell us the apocalypse” since the theme was “the future”. I’m really proud of what they created, it’s quite fun and evil and they were able to use a LOT of biases.
My remote workshop facilitation tips
Have a co-facilitator and / or technical assistance
Facilitating alone is complicated face to face. It gets worse remotely. If possible, try to have a co-facilitator to help you. Especially for a workshop where you will send people to breakout rooms. For this particular one, we had 4 groups. We were 2 people. which means that half of the participants always had someone with them in the groups.
If you can’t have a co-facilitator, at least try to have someone in charge of the technical questions. It’s really hard to deal with technical issues while facilitating. Present the “technical person” at the beginning. And tell participants they can contact that person in DM for technical problems. Usually, when I am facilitating alone, I try to have someone from the workshop organization to help. Or a colleague / friend if I am organizing.
Try to build a pleasant human experience
I’m not going to lie: online workshops are strange. Really. So, in many of my online workshops I’m trying my best to get people more comfortable:
- I always tell participants they don’t have to switch on the camera. But they can if they want.
- I also tell them they can either use the chat or the microphone, whatever makes them the most comfortable
- I put on some smooth music at the beginning while waiting for everyone to arrive. I even saw that some tools now offer this option already built it. This is nice.
- I decorate my boards with some real life elements like plants and furniture. It might sound silly, but most people like this kind of small little touch. It helps bring the whole board together. It also gives a sense of spatial orientation in a virtually unlimited giant white board. I think I stole that idea from the Friends of Figma Munich workshops but I also saw it into the article The quest of turning an event from physical to digital.
- I like to have a “resources” board as well. It is a board full of links to articles, videos, papers that participants can check it they want go further
Help people discover the tool(s)
Many of your workshop users might not be familiar with Miro (or the tool you use). You could present the tool at the beginning of the workshop. But this might take some time.
Another possibility is to send a “presentation” board a little bit before the workshop. This lets people get familiar with the tool before the big day.
Also note that it is a little bit strange for a lot of people to “see” people write, and have other people see them write. Break the ice and tell participants that this is strange for everyone 🙂
Use an Icebreaker to get people comfortable with the tool
Speaking of breaking the ice: just like for face to face workshops, we strongly advise that you start this workshop with a small icebreaker.
This can also be a quick way to show the tool to the people as well. And help them get comfortable with how strange remote workshops can be.
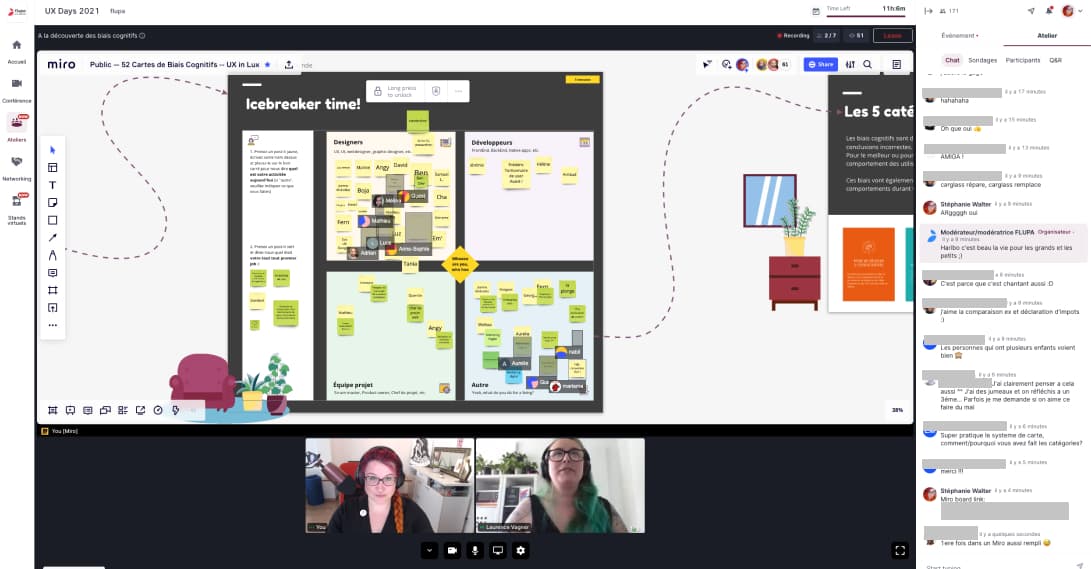
For our workshop, we used the “who are you” icebreaker. We have a quadrant and ask people to use a post it to tell us who they are and what job they do today. Then a post it in another color to tell us what their first every paid job was. They put those in one of the 4 categories on our quadrant: designer, devs, project team, other. This let people get used to a couple of things:
- find their way and get oriented in that big digital space
- experience drag and dropping post its (that we need later in the workshop)
- experience writing on the post it
- experience seeing other people moving elements around them (again, this might be quite strange at the beginning)
Hide the boards that are not useful yet
The full board might look scary with a lot of content. In order to avoid cognitive overload, I usually hide the boards that are not useful yet. I do that by putting a giant white rectangle on top of it. And I lock it. Then I move it to show the next activity.
Lock things you don’t want people to move around
Speaking of locking… I don’t know about the other tools, but Miro has this really great feature where you can lock things. Usually, I try to lock anything that participants don’t need to move. Or to interact with. This avoids someone moving some stuff by mistake, and ruining the workshop without me noticing.
A few tips to stay on time
Workshop timing is often quite tight. Here are a few things I usually do / like to make sure we respect the time box:
- I plan the time box ahead. And put the expected time box for each activity on the board
- I account for the time for “switching rooms” in remote tools in my schedule. For example, I know people will have 1 minute in Zoom for example to go back from the break out rooms to the main room. Same for going into those rooms. So this time has to be accounted for in the workshop. Especially when I have lots of back and forth activities.
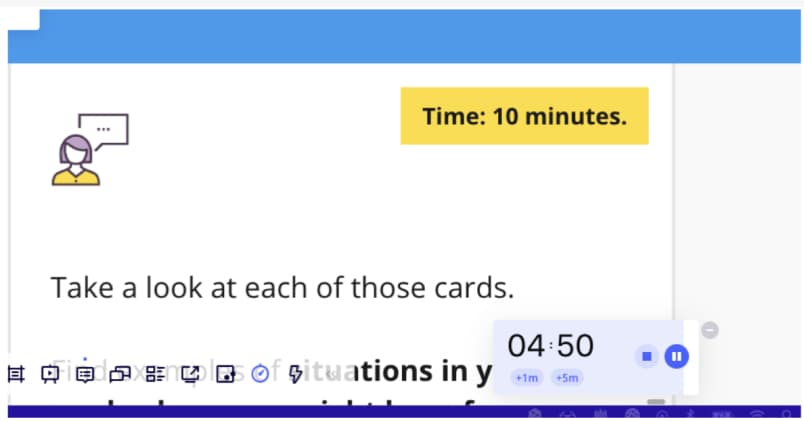
- If use the Miro timer tool. This way participants know how much time is left. I admit I sometimes cheat and adapt, especially if the switch to break out room
Also, if I need people to present, I will help them prepare present:
- Before starting the activity, I tell people what they will need to present and how
- I tell them to decide who will present and what
- A few minutes before the end of the activity, I remind them to decide who will present, how, and what.
As mentioned above, I also try to avoid too many different screen sharing. Especially if I’m using some web based tools that might need some access or something. If possible, I do the sharing on my screen.
Conclusion
Those are the main tips I have for you to bring our Cognitive Bias workshop online. Many of the tips here can apply to other workshops as well. I’m always curious to learn more about your tips. So please reach out on Twitter, Linkedin or by email if you have more tips and tricks on remote workshop facilitation.